Get and Crack Windows 10 Passwords
All HowTo's
Cyber-Security
Windows
This article demonstrates one way to get and crack Windows 10 passwords. All the steps are completed on Windows 10. The last step of running the hashes through the Rainbow attack process could be replaced with John (JtR). The tools we’ll use are: Windows 10 Pro samdump2 mimikatz https://crackstation.net Step
October 05, 2020
|
Andrew Galdes
Read More
Generate a CSR With Alt Names Using OpenSSL
All HowTo's
Cyber-Security
This article demonstrates how to generate a CSR (certificate signing request) using OpenSSL. In the examples below, change the bold text to be correct for you. Generate the key file: openssl genrsa -out example.key 2048 && chmod 0600 example.key Create the config file as “/etc/httpd/example.csr.conf: [ req ] default_bits =
September 11, 2020
|
Andrew Galdes
Read More
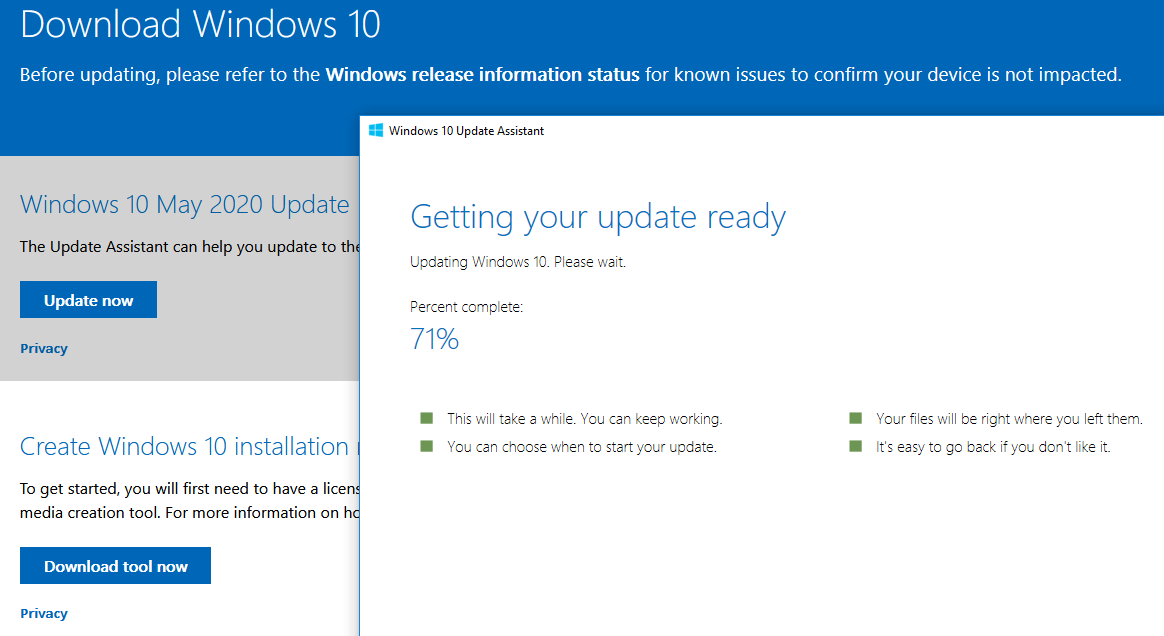
Windows Updates Failing – How To Force It
All HowTo's
Cyber-Security
Windows
Trouble installing Windows 10 Updates? This article is for you. Visit the site: https://www.microsoft.com/en-us/software-download/windows10 … and click the “Update Now” button. The program that downloads helps you manually update Windows. Execute it and go through the Wizard. Warning, this takes your computer into a process of uninterruptible reboots and updates
September 04, 2020
|
Andrew Galdes
Read More
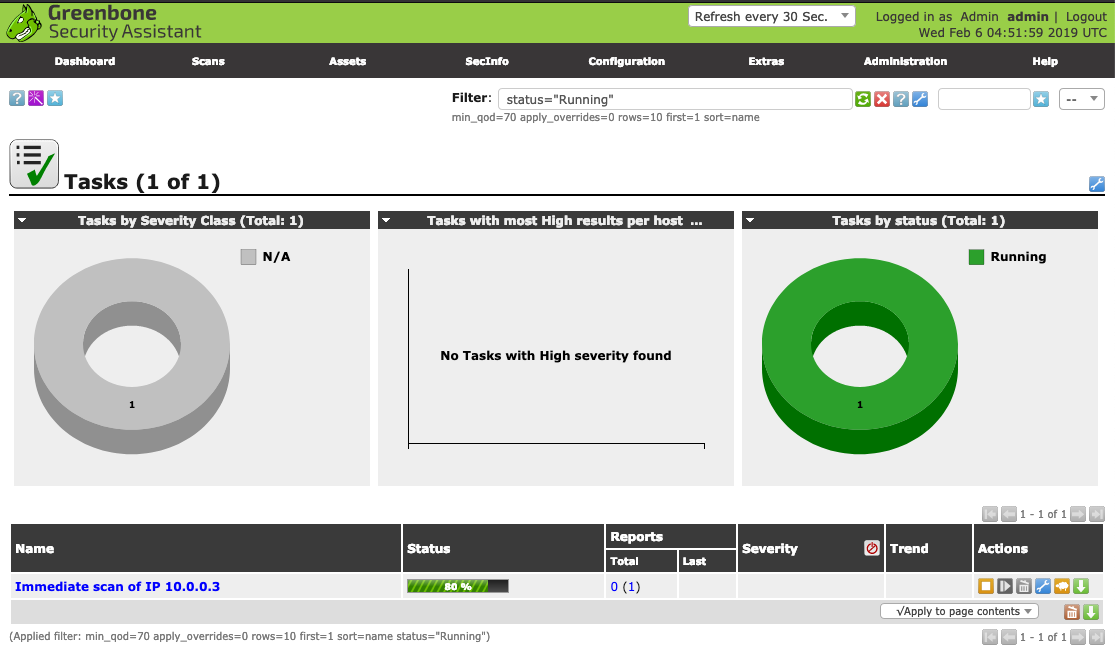
Installing OpenVAS on Kali in 2020
All HowTo's
Cyber-Security
Linux
Redhat, Fedora and CentOS Linux
Ubuntu, Mint & Debian Linux
This article explains how to install OpenVAS on Kali Linux. The difference between this method and others is the switch from “openvas” to “gvm” for naming/marketing. As you might have seen, I’ve written several articles on installing and using OpenVAS on CentOS. Don’t do it. Don’t go through the pain
August 14, 2020
|
Andrew Galdes
Read More
Protecting Against AirCrack-NG
AGIX Discussion
All HowTo's
Cyber-Security
This is a short article focused on helping you protect your wireless network from hackers. The AirCrack-NG suite is the most common set of tools used to crack wireless networks. For that reason, we’re focused on that suite for this article. Other tools need to deal with the same wireless
August 09, 2020
|
Andrew Galdes
Read More
Cracking WIFI with AirCrack-NG (Fedora, CentOS, RHEL)
All HowTo's
Cyber-Security
Linux
Redhat, Fedora and CentOS Linux
This article demonstrates how to crack a wireless network using the AirCrack-NG suite. Note that this will only work with WPA/WPA2 PSK wireless networks. That’s the limits of this generation of the AirCrack-NG suite. Only do this on a network that you own or are responsible for and have permission
August 09, 2020
|
Andrew Galdes
Read More
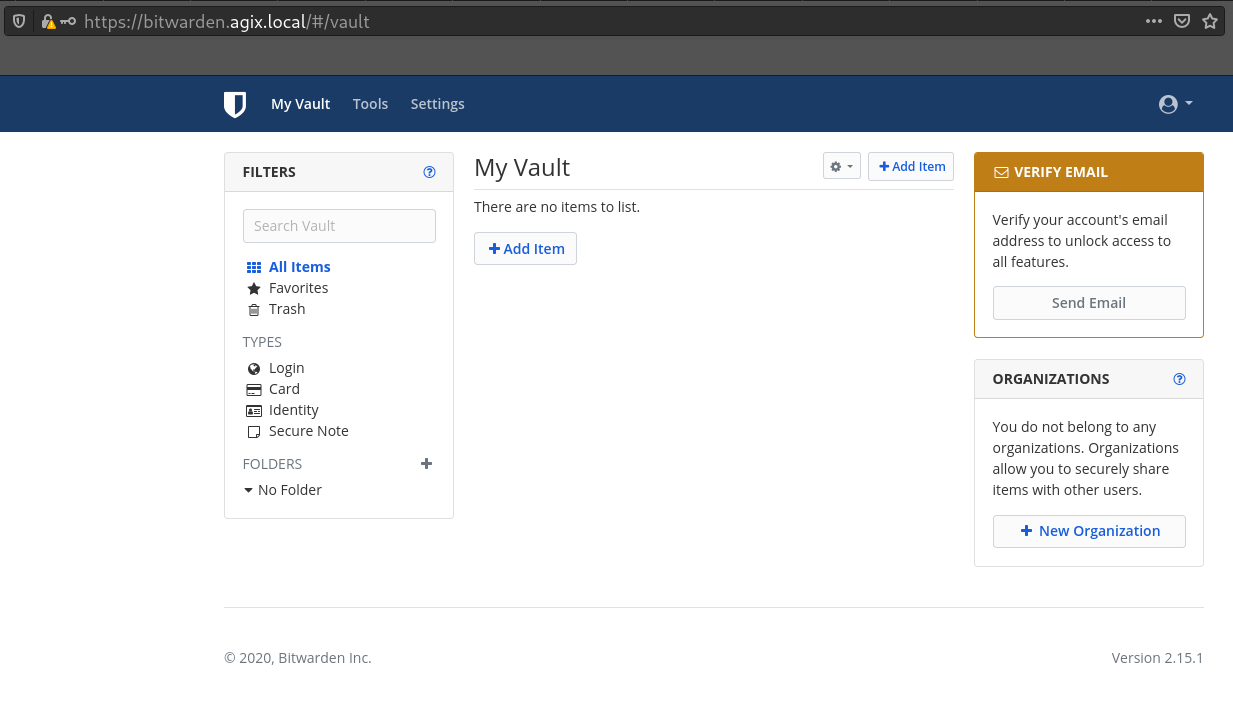
Installing Bitwarden in Docker on Fedora
All HowTo's
Cyber-Security
Kubernetes & Docker
Linux
Redhat, Fedora and CentOS Linux
Ubuntu, Mint & Debian Linux
This article is quick walk-through explaining how to install Bitwarden on Fedora 32 but should work on CentOS 7 and 8 as well as RHEL. Install the docker packages: yum install docker docker-compose systemctl enable docker systemctl restart docker Download the Bitwarden scripts: curl -Lso bitwarden.sh https://go.btwrdn.co/bw-sh chmod +x bitwarden.sh
July 29, 2020
|
Andrew Galdes
Read More
Nmap with Vulscan on CentOS 7 or 8 – A short HowTo
All HowTo's
Cyber-Security
Linux
Redhat, Fedora and CentOS Linux
Web Servers
This article shows how to install and run Nmap using the Vulscan add-on to do vulnerability assessments. Download Nmap: yum install nmap Install the Vulscan.nse script: /usr/share/nmap git clone https://github.com/scipag/vulscan vulscan Run a scan targeting the machine (in this example) “192.168.4.250”: nmap -sV --script vulscan/vulscan.nse 192.168.4.250 My output looks like
July 17, 2020
|
Andrew Galdes
Read More
Nmap with Vulners on CentOS 7 or 8 – A short HowTo
All HowTo's
Cyber-Security
Linux
Redhat, Fedora and CentOS Linux
Web Servers
This article shows how to install and run Nmap using the Vulners script to do vulnerability assessments. Download Nmap: yum install nmap Install the Vulners.nse script: /usr/share/nmap wget https://svn.nmap.org/nmap/scripts/vulners.nse Run a scan targetting the machine (in this example) “192.168.4.250”: nmap -sV --script vulners.nse 192.168.4.250 My output looks like this: 22/tcp
July 17, 2020
|
Andrew Galdes
Read More
Restore pfSense From Backup Using The CLI (command line)
All HowTo's
Cyber-Security
pfSense & Netgate
When all goes bad and you can’t get to the web interface of your Netgate pfSense, you’ll have no option but to try using the CLI (command line). This happened to me recently and this article explains what i did to recover. A few worthy points: The pfSense configuration file
June 28, 2020
|
Andrew Galdes
Read More